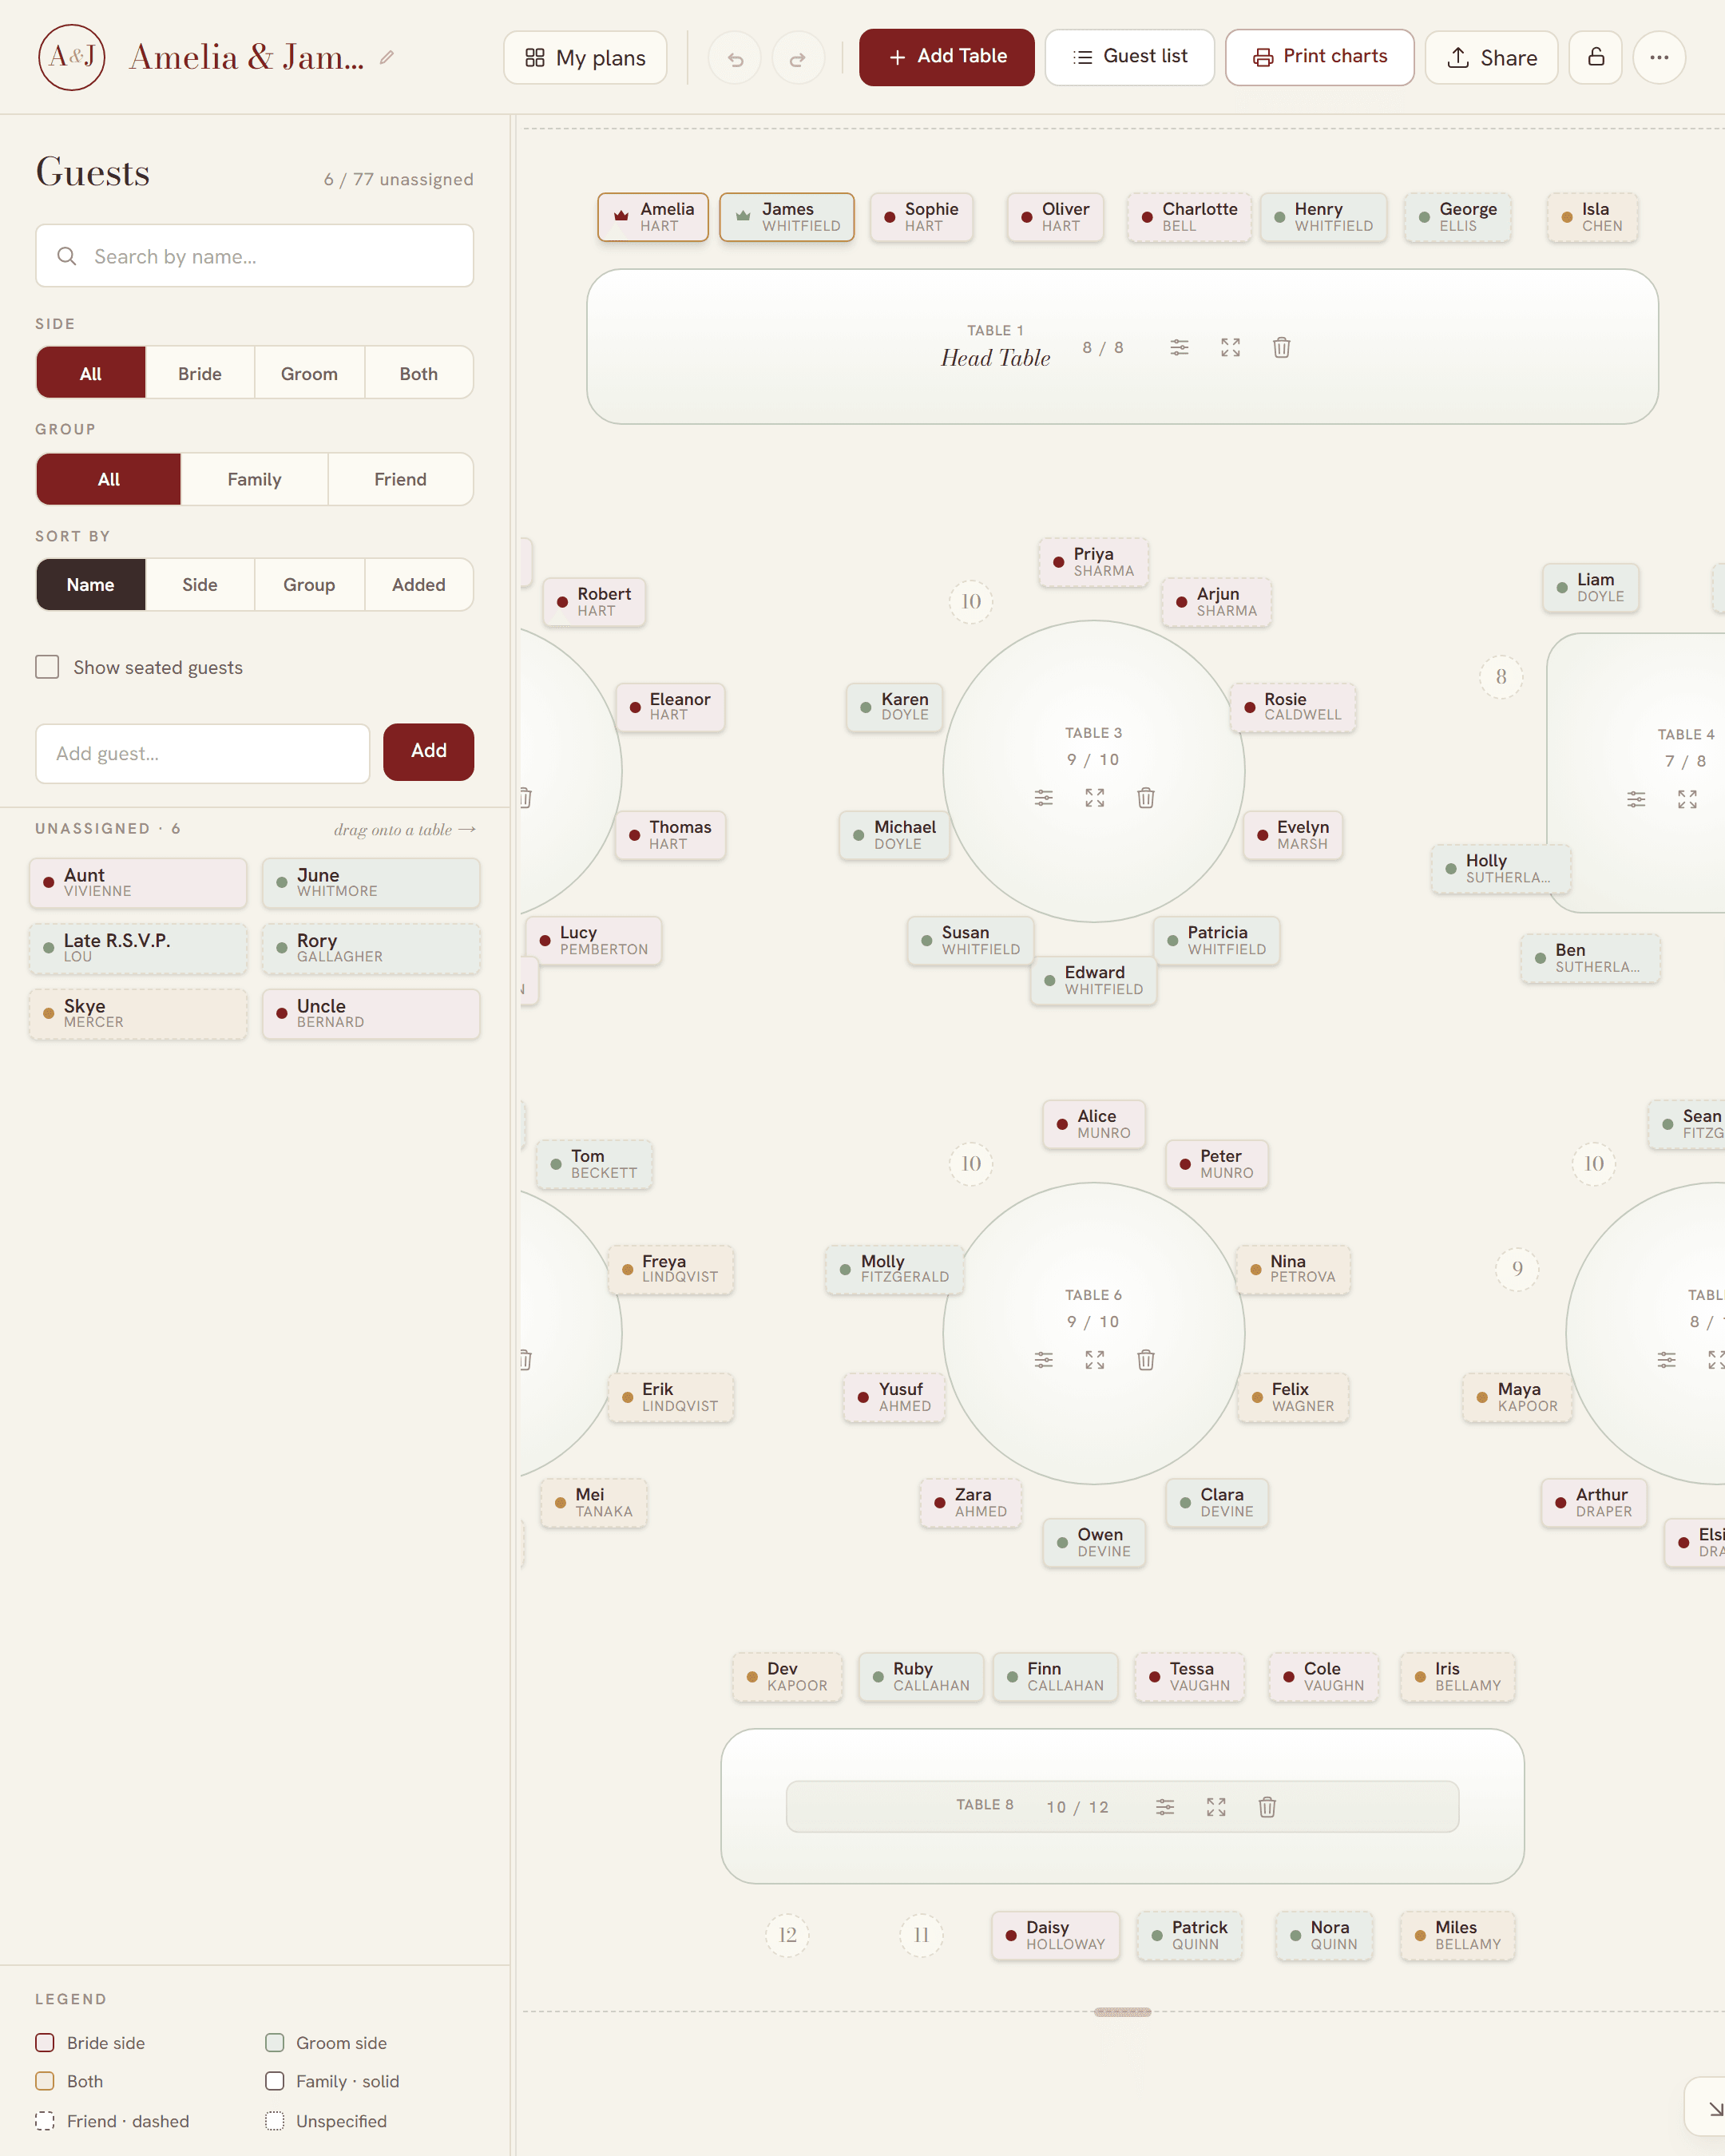
Step 1 — Start after the RSVP deadline, not before
Every hour spent seating unconfirmed guests is an hour you will spend again. Roughly one guest in ten changes state after the invitations go out — a plus-one appears, a cousin cancels, someone’s new partner needs a chair — and each change ripples through two or three tables.
Do the room early and the people late. A rough working timeline:
| When | What |
|---|---|
| 3–4 months out | Confirm the floor plan, table shapes and table count with the venue. |
| 6–8 weeks out | Invitations out, RSVP deadline set. Start the guest spreadsheet properly. |
| 3–4 weeks out | RSVP deadline. Chase the non-responders by phone, not email. |
| 2–3 weeks out | Build the plan. This is the week the seating actually happens. |
| 2 weeks out | Share the draft with both sets of parents for a sanity check. |
| 1–2 weeks out | Final numbers to the venue or caterer. Order or print the chart and cards. |
| 2–3 days out | Last changes. Reprint only what changed. |
Step 2 — Get the floor plan before you seat anyone
Ask the venue for the floor plan with tables drawn on it, and ask three specific questions: what diameter the round tables are, how many they own, and whether the plan includes the dance floor. A chart built for 183 cm rounds when the venue owns 152 cm ones is short two seats a table.
Note the fixed things while you are at it — where the doors, the bar, the band and the kitchen entrance are. Those decide which tables you will not want to seat your grandmother at. Seat counts by table size are in how many guests fit at each wedding table.
Step 3 — Decide what you are assigning
- Open seating — no plan at all. Works for a stand-up reception or under about fifty guests who all know each other. At a sit-down dinner it produces a scramble and leaves someone standing.
- Assigned tables — the default, and enough for most weddings. Guests find their table and choose a chair.
- Assigned seats — worth it for plated service, for long banquet tables, and any time you have specific pairings in mind. It is also the only way to guarantee that the person who does not know anybody is sitting next to the person you chose for them.
Step 4 — Build one guest list, not four
The single most common cause of seating chaos is three versions of the list: the invitation spreadsheet, the RSVP website, and the notes on your phone. Pick one and make it the truth. It needs a row per person — not per invitation, not per household — because chairs are per person. “Smith family (4)” is where the miscounts start.
Columns worth having:
- Full name, as it will appear on the chart.
- Side — bride, groom, or both.
- Group — family or friend, and ideally a finer label like uni, work, neighbours.
- RSVP status.
- Meal choice and dietary requirements, which the caterer will want by table.
- Notes: mobility, who they know, who to keep them away from.
If it is already in a spreadsheet, you do not have to retype it — see building a seating chart from your guest list.
Step 5 — Group before you seat
Do not start by putting people at tables. Start by putting people into clusters, on paper or on screen, with no table involved:
- Households first — anyone arriving together sits together. This is non-negotiable and it collapses the list fast.
- Then circles: your school friends, their work colleagues, the running club, each side’s aunts and uncles.
- Then note the strays — the guests who belong to no cluster. Usually a handful of plus-ones, a former colleague, a family friend of your parents.
Now count each cluster against your table size. A cluster of twelve does not fit a table of ten, and the decision of which two to move is far easier made now, in the abstract, than at eleven at night with a finished chart in front of you.
Step 6 — Seat the hard cases first
Easy guests fit anywhere, which is exactly why they should go last. Place the constrained people while you still have the whole room to work with.
Divorced, separated or estranged parents
Two tables of equal standing, both near the front, not facing each other. Fill each with that parent’s own people so neither reads as the lesser table. New partners sit with the parent they came with, out of the ex-spouse’s direct eyeline.
The people who cannot be near each other
Every family has some. Ask a parent — they know about disputes you do not, and they would much rather be consulted now than surprised on the day. Put distance and, if possible, a sightline break between them.
Guests who know almost nobody
A new partner, a colleague, someone’s interstate friend. Do not seat them together — that is a table of strangers with nothing to talk about. Seat them individually with your most sociable friends, and if you are assigning seats, choose their neighbour deliberately.
Children
Under about seven, with their parents. Older than that, a kids’ table works well and is usually the happiest table in the room — put it within sight of the parents and not next to the speakers. Ask the venue about high chairs and count them as seats.
Colleagues
One table, together. They know each other, they will talk shop, and they will have a better night than if you scatter them among your relatives to be polite.
Step 7 — Place yourselves
A head table with the wedding party, a sweetheart table for the two of you, or a long king’s table with everyone seated on both sides. Each has consequences for the partners of your wedding party and for your parents. This is the decision most likely to be re-argued, so make it early and see wedding head table seating for who traditionally sits where.
Step 8 — Comfort and access
- Wheelchair users need a clear route to the table and a seat that is not pinned against a wall — ask the venue for a 90 cm approach and check the table height.
- Older guests and anyone hard of hearing go away from the speakers and the band, and near an exit.
- Pregnant guests, and parents of very small children, near an exit and near the toilets.
- Anyone giving a speech should be on an aisle, near the microphone, not stuck in the middle of a run of ten.
- No table directly in front of the kitchen door, the service lane or the toilet corridor.
- Keep dietary requirements attached to the guest, not to a separate list — the caterer will ask for them by table.
Step 9 — Number or name the tables
Numbers are easier for guests to find and easier for the caterer to work with. Names — cities you have travelled to, favourite books, the pubs of your twenties — are lovelier and cost you a little navigability, so if you use them, make the chart show clearly where each named table is or keep a number alongside the name.
Whichever you choose, avoid table one carrying any status. If the head table is numbered one, someone will notice they are at fifteen.
Step 10 — Display it so people can find themselves
- One chart at the entrance, listing every guest alphabetically by surname with their table. This is the version that works: guests look for their own name, not for their table.
- A clear number or name on each table, readable from across the room and tall enough to see over a centrepiece.
- Place cards on the table if you assigned seats. Escort cards — one per guest, collected at the entrance — are an alternative to a chart for smaller weddings.
- Print a spare of everything, and take a photo of the finished plan on your phone.
SeatFlow generates all four of these from the plan you built — the alphabetical guest list, a table-by-table poster, table number cards and tent-fold place cards — so the printed version cannot drift from the plan. Clean, full-resolution downloads of all of them are free — no watermark on them.
Step 11 — Expect it to change, and plan for it
Guests cancel in the last fortnight. Do not rebuild — patch. Move one or two people, tell the venue the new number, reprint the place cards that changed and leave the rest alone. If you built the plan somewhere that keeps a history, an experimental rearrangement is cheap because you can put it back.
The short version
- Confirm the floor plan, table shapes and counts with the venue.
- Wait for the RSVP deadline. Chase stragglers by phone.
- Get every guest into one list, one row per person.
- Group into households, then circles, then note the strays.
- Decide: assigned tables, or assigned seats.
- Seat the difficult cases first — parents, feuds, lone guests, children.
- Place yourselves: head table, sweetheart table or king’s table.
- Check access, sightlines and speakers.
- Number or name the tables.
- Send the draft to both sets of parents before you print anything.
- Print an alphabetical entrance chart plus table markers.
- Patch, do not rebuild, in the last two weeks.